There’s something about raspberry crumble bars that feels like a gentle bridge between childhood and grown-up tastes. I remember the first time I made them—how the tartness of fresh raspberries balanced with the buttery crumble, reminding me of afternoons spent in my grandma’s kitchen. It’s funny how a simple snack can carry so much nostalgia, yet still surprise with a touch of sophistication when you tweak the ingredients or presentation.
Turning this familiar treat into something a bit more refined for those quiet, thoughtful moments has become a little ritual for me. I love how the bright, juicy raspberries burst with every bite, contrasting against the crispy, golden topping. It’s one of those recipes that feels like a quiet celebration of childhood memories, but with an elegant upgrade that makes it special enough for grown-up teatime or a casual dinner party.
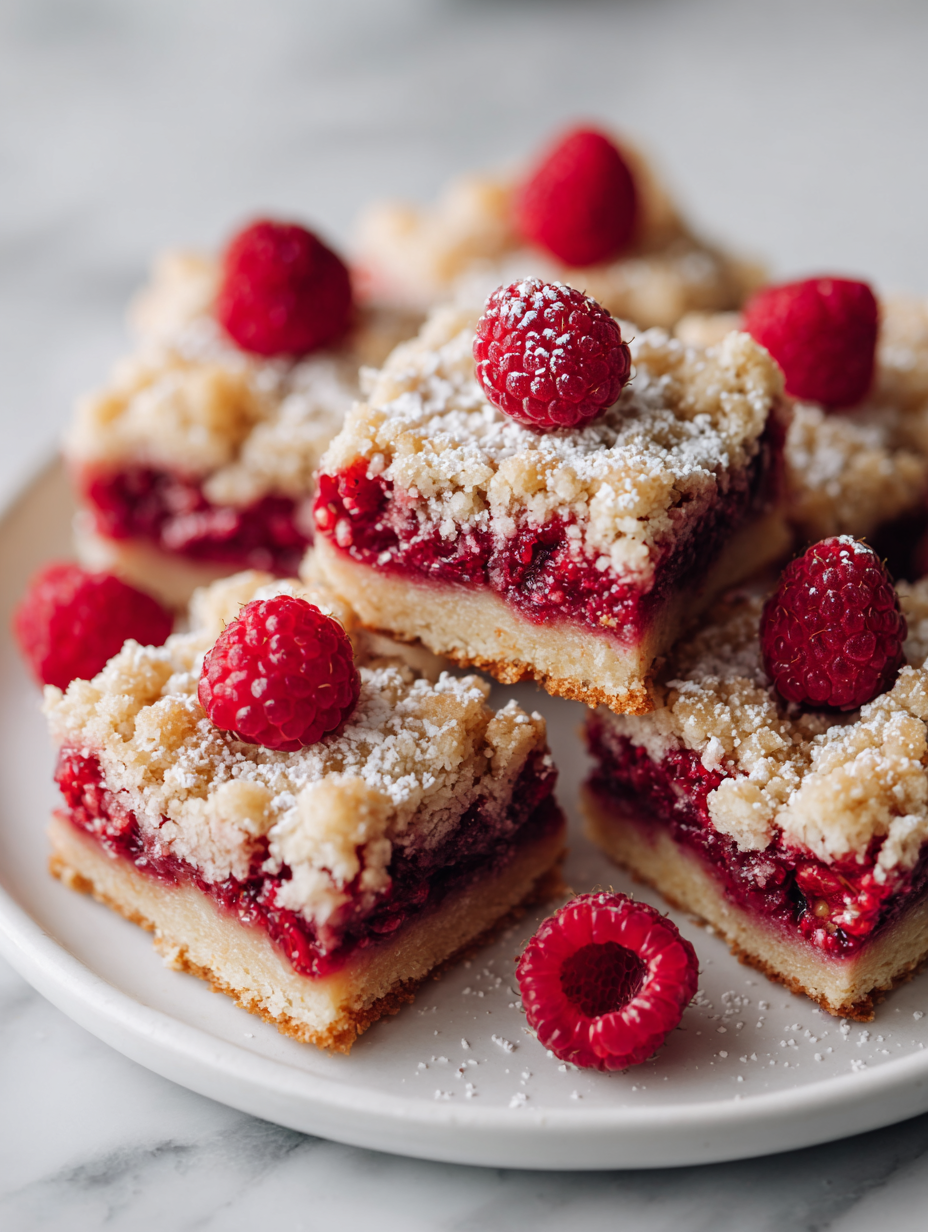
Focusing on how this recipe turns a simple childhood snack into a sophisticated dessert for grown-ups, blending nostalgia with a touch of elegance.
The story behind this recipe
- This recipe grew out of a lazy summer afternoon, when I had a handful of fresh raspberries and a craving for something sweet but not overly heavy. I wanted a treat that was easy to whip up but still felt special—a bit of a balance between casual snack and dessert. The idea of a bar, with its portable, no-fuss vibe, made it perfect for those spontaneous baking moments.
- I remember experimenting with different crumb textures and berry ratios, trying to find that perfect balance of tartness and richness. Each batch was a little different, but I learned that a touch of lemon zest in the raspberry filling really brightens things up. These bars became a quick favorite, especially when I wanted something that felt homemade but didn’t demand hours in the kitchen.
- heading: The story behind this recipe
Ingredient breakdown: key components
- Raspberries: I love using fresh, ripe berries—they release a vibrant, tart juice that seeps into the crust. If yours are a bit soft, add a splash of lemon juice to brighten the flavor.
- Butter: I always go for unsalted, cold butter—it’s key for flaky, tender crumble. If you only have salted, just cut back a pinch on the added salt in the topping.
- Sugar: Granulated sugar keeps the crumble crisp and sweet; for a deeper flavor, try a touch of brown sugar, which adds a molasses-y warmth.
- Flour: I use all-purpose flour for structure, but if you want a nuttier flavor, swap in some almond flour—just reduce the overall amount slightly to keep the crumble crumbly.
- Lemon zest: Brightens the raspberry filling with a fresh citrus aroma. If you don’t have fresh, a little lemon extract works, but use sparingly to avoid overpowering.
- Oats: Rolled oats give texture and chewiness. For a nuttier bite, toast them lightly before mixing into the crumble—watch for that golden hue and nutty aroma.
- Cornstarch: I add a small amount to thicken the raspberry juices, making a glossy, oozy filling. If you prefer a runnier filling, skip it; for a thicker jammy texture, increase slightly.
Spotlight on key ingredients
Raspberries:
- I love using fresh, ripe berries—they release a vibrant, tart juice that seeps into the crust. If yours are a bit soft, add a splash of lemon juice to brighten the flavor.
- Oats: Rolled oats give texture and chewiness. For a nuttier bite, toast them lightly before mixing into the crumble—watch for that golden hue and nutty aroma.
Butter & Sugar:
- Butter: I always go for unsalted, cold butter—it’s key for flaky, tender crumble. If you only have salted, just cut back a pinch on the added salt in the topping.
- Sugar: Granulated sugar keeps the crumble crisp and sweet; for a deeper flavor, try a touch of brown sugar, which adds a molasses-y warmth.
Notes for ingredient swaps
- Fresh Raspberries: I love using ripe, juicy berries—they burst with tartness and sweetness. If your raspberries are soft or a bit past their prime, add a splash of lemon juice to brighten the flavor.
- Frozen Raspberries: A handy substitute when fresh aren’t available. Thaw and drain well; expect a slightly softer filling, but still delicious. Adjust baking time if needed.
- Butter: I prefer unsalted, cold butter for a flaky crumble. If you only have salted, reduce the added salt in the crust and topping by a pinch.
- Vegan Butter or Margarine: Works as a 1:1 swap for traditional butter, but the crumble might be a bit less tender and more crumbly—still tasty.
- Sugar: Granulated sugar keeps the topping crisp. For a deeper, caramel-like flavor, swap in light brown sugar—just expect a slightly darker, richer crumble.
- Gluten-Free Flour: Use a 1:1 gluten-free baking blend for the crust. The texture may be a bit more crumbly, but it still holds together well with a slight toasty note.
- Oats: Regular rolled oats are best for texture, but if you need to skip oats, add a handful of chopped nuts or seeds for crunch and richness.
Equipment & Tools
- 9-inch square baking pan: Holds the entire dessert for baking and slicing.
- Parchment paper: Prevents sticking and makes removal easy.
- Pastry cutter or fingertips: Incorporates butter into dry ingredients for crumble.
- Mixing bowls: Combines ingredients for crust and filling.
- Small bowl: Mixes berries with sugar and zest.
- Wire cooling rack: Allows air circulation to cool bars evenly.
Step-by-step guide to raspberry crumble bars
- Preheat your oven to 180°C (356°F). Line a 9-inch square baking pan with parchment paper, leaving an overhang for easy removal.
- In a mixing bowl, combine 1 cup (120g) of all-purpose flour, 1/2 cup (100g) of granulated sugar, 1/2 teaspoon of salt, and 1/2 teaspoon of baking powder. Mix well.
- Add 1/2 cup (113g) of cold unsalted butter, cut into small cubes. Use a pastry cutter or your fingertips to blend until the mixture resembles coarse crumbs.
- Press two-thirds of the crumble mixture evenly into the bottom of the prepared pan. It should be compact but not too dense.
- In a small bowl, stir 1 cup (150g) of fresh raspberries with 1 tablespoon of sugar and a teaspoon of lemon zest. Spread this mixture evenly over the crust.
- Sprinkle the remaining crumble mix over the raspberry layer, gently pressing some of it into the berries for better cohesion.
- Bake for 35-40 minutes, until the top is golden and crisp, and the raspberry filling is bubbling at the edges. Keep an eye on the edges to prevent over-browning.
- Remove from oven and let cool in the pan on a wire rack for at least 30 minutes. The filling will thicken as it cools.
- Once cooled, lift the bars out using the parchment overhang. Slice into squares and serve slightly warm or at room temperature.
Let the bars cool completely on a wire rack, then slice into squares. Serve at room temperature or slightly warmed, perhaps with a dollop of whipped cream or a scoop of vanilla ice cream for extra indulgence.
How to Know It’s Done
- Golden, crisp topping with lightly browned edges.
- Filling should be bubbly and thickened, not runny.
- Bars hold shape when cut, with a slight jiggle in the filling.
Raspberry Crumble Bars
Ingredients
Equipment
Method
- Preheat your oven to 180°C (356°F). Line a 9-inch square baking pan with parchment paper, leaving overhang for easy removal.
- In a large mixing bowl, whisk together the flour, sugar, salt, and baking powder until combined.
- Add the cold, cubed butter to the dry mixture. Use a pastry cutter or your fingertips to quickly rub in the butter until the mixture resembles coarse crumbs with some pea-sized bits.
- Press about two-thirds of this crumb mixture evenly into the bottom of the prepared pan, pressing firmly to create a smooth, compact crust.
- In a small bowl, combine the raspberries with the sugar and lemon zest, gently stirring to coat the berries evenly. Spread this vibrant mixture over the crust layer.
- Sprinkle the remaining crumble mixture evenly over the raspberry layer, pressing lightly into the berries to help everything stick together.
- Bake in the preheated oven for 35-40 minutes, until the topping turns a golden brown and the raspberry filling is bubbling at the edges.
- Remove the pan from the oven and let the bars cool on a wire rack for at least 30 minutes. This allows the filling to set and the topping to become crisp.
- Once cooled, lift the bars out of the pan using the parchment overhang. Slice into squares using a sharp knife.
- Serve the bars slightly warm or at room temperature. Enjoy the crisp topping with the jammy, tart raspberry filling for a nostalgic yet sophisticated treat.
Pro tips for perfect raspberry crumble bars
- Chill the butter: Keep it cold for a flaky crumble that holds together. Use cold butter straight from the fridge.
- Toast the oats: Lightly toast rolled oats before mixing for a nutty aroma and richer texture.
- Layer gently: Spread raspberries evenly without crushing to keep the filling vibrant and intact.
- Check the color: The topping should be golden brown, signaling perfect crispness and sweetness.
- Avoid overbaking: Keep an eye on the edges to prevent burning; remove when golden and bubbling.
- Use parchment: Line your pan for easy removal and clean slices, preventing sticking and messes.
- Cool completely: Let the bars rest until fully cooled for clean cuts and firm texture.
Common mistakes and how to fix them
- FORGOT to tighten crumble edges → Use a fork to press crust evenly.
- DUMPED filling too early → Wait until topping is golden and bubbling.
- OVER-TORCHED edges → Cover edges with foil to prevent burning.
- DIDN’T chill dough → Refrigerate crust before baking for better texture.
Quick fixes and pantry swaps
- If berries are soft, splash with lemon juice to brighten and firm up.
- When crumble is too crumbly, add a tiny bit of melted butter to bind.
- Splash a little water if crumble mixture is too dry and won’t hold together.
- Patch a burnt edge with foil immediately to prevent over-browning.
- Shield the bars with foil if oven smells smoky during baking.
Prep, store, and reheat tips
- Prepare the crust and crumble topping ahead; store in an airtight container at room temperature for up to 2 days, which keeps the mixture crisp and ready to assemble.
- Assemble the raspberry filling just before baking to prevent berries from releasing too much juice prematurely, ensuring a vibrant, oozy layer when baked.
- Bars can be baked up to 2 days in advance; cool completely, then store in an airtight container at room temperature for best texture and flavor.
- Reheat gently in a 150°C (300°F) oven for about 10 minutes until slightly warm and the topping shimmers, releasing a fresh-baked aroma.
- Shelf life is about 3 days when kept airtight at room temperature; for longer storage, refrigerate for up to 5 days, but expect the crust to soften slightly.
- For freezing, wrap bars individually in plastic wrap, then store in a freezer-safe bag for up to 1 month. Thaw at room temperature and rewarm as above for a cozy, fresh taste.
Top questions about raspberry crumble bars
1. Can I use frozen raspberries?
Use fresh raspberries for the best tartness and juiciness. Frozen can work, but drain excess moisture first.
2. Can I substitute other berries?
Yes, you can swap in other berries like blackberries or blueberries, but expect a slightly different flavor and texture.
3. Can I make these vegan?
Absolutely, using vegan butter or margarine makes this recipe plant-based, though the texture might be a touch more crumbly.
4. Should I chill the crust before baking?
Chill the dough for at least 30 minutes before baking to help it hold together and develop better flavor.
5. How do I know when they’re done?
Bake until the topping is golden brown and the filling is bubbling at the edges, about 35-40 minutes at 180°C (356°F).
6. How long do these bars last?
Store bars in an airtight container at room temperature for up to 2 days, or refrigerate for longer freshness.
7. Can I reheat leftovers?
Reheat in a low oven or microwave until warm and crisp on top, about 10 minutes or 30 seconds, respectively.
8. What if the topping over-browns?
If the crumble topping browns too quickly, tent it with foil to prevent burning while the inside finishes baking.
9. Can I add nuts to the crumble?
Use a combination of rolled oats and chopped nuts for extra crunch and flavor in the crumble.
10. How can I enhance the raspberry flavor?
Adding a teaspoon of lemon zest to the raspberry filling really brightens the overall flavor and adds freshness.
These raspberry crumble bars are a little reminder of how simple ingredients can come together into something special. Their bright berry flavor and buttery crunch make them perfect for any season or mood. I find myself reaching for them when I need a quick, honest treat that’s both nostalgic and a bit refined.
Sharing them with friends or just enjoying a quiet moment alone, these bars always seem to bring a little bit of comfort and joy. They’re the kind of dessert that feels like a small victory—something you made yourself, with a little bit of love in every bite.

Hi, I’m Benjamin Reynolds, the creator behind Strategically Seasoning. I started this blog because I believe great cooking is not random. It is thoughtful. It is intentional. It is built step by step with purpose. Seasoning is not something you sprinkle at the end and hope for the best. It is a strategy.

