Peanut butter isn’t just for spreading on toast or sneaking into snacks. It’s actually a secret weapon in baking, especially when you want something that’s both rich and unexpectedly tender. These muffins turn that creamy, nutty jar staple into a moist, flavorful treat that feels like a warm hug in the morning or afternoon.
I started experimenting with using peanut butter directly in muffin batter after noticing how it adds a depth of flavor and keeps things incredibly moist without any weird aftertaste. It’s like a little culinary alchemy—transforming a simple ingredient into something more complex and satisfying. Plus, the smell alone as they bake is enough to make you forget about any other breakfast plans.
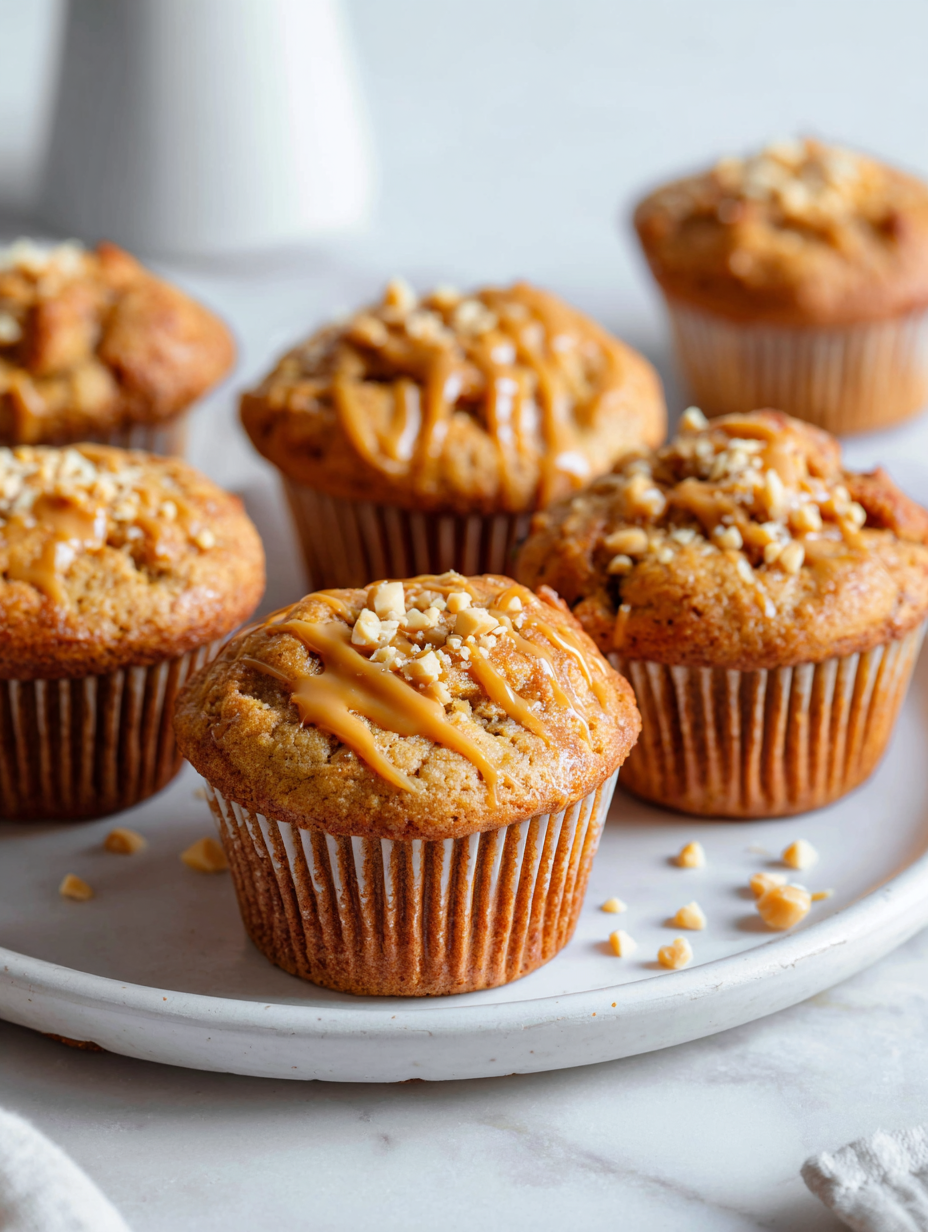
Focusing on how peanut butter can be transformed from a simple spread into a rich, moist muffin ingredient, highlighting its role in creating a uniquely creamy texture and deep, nutty flavor in baked goods.
Turning Peanut Butter into Morning Magic
- Making these muffins always reminds me of lazy Sunday mornings, the smell of peanut butter and baked goods filling the house.
- I love how the batter comes together so quickly; it’s almost too easy to resist sneaking a taste before baking.
- There’s a nostalgic comfort in biting into a warm muffin that’s both fluffy and packed with rich, nutty flavor.
- Whenever I share these muffins with friends, they’re always surprised by how moist and flavorful peanut butter can make baked treats.
- These muffins have become my go-to for busy mornings—filling, satisfying, and just a little bit indulgent.
Turning Peanut Butter into Morning Magic
- This recipe was born out of a lazy afternoon craving for something cozy and satisfying, but with a little twist. I was digging through my pantry, looking for a way to elevate my usual muffin routine, when I spotted that jar of peanut butter. Suddenly, it clicked—why not bake with it directly? The idea of turning a simple spread into a moist, nutty muffin felt like a small act of kitchen rebellion that I had to try.
- Ever since, these muffins have become my go-to for quick mornings or when I need a comforting bite that’s not too sweet. The best part? That deep, roasted peanut aroma that fills the house as they bake, making everyone pause at the oven. Sometimes, I think about how a humble ingredient like peanut butter can turn into a moment of pure, simple joy—no fuss, just flavor.
- I kept tweaking the batter until I found the perfect balance—just enough peanut butter for richness, but not so much that they’re dense. Now, they’re my little homemade gift, my way of sneaking a bit of indulgence into the busy days. Plus, they pair perfectly with a cold glass of milk or a hot cup of coffee, making mornings feel a little more special.
Peanut Butter’s Unexpected Baking Role
- Peanut butter has been a pantry staple since the early 20th century, originally popularized as a nutritious, easy protein source.
- In some cultures, similar nut-based spreads have been used in baking for centuries, but peanut butter’s smooth, creamy texture revolutionized its culinary use in America.
- This muffin idea came from a desire to turn a beloved snack into a breakfast-friendly, portable treat, blending comfort with practicality.
Ingredient breakdown: key components
- Peanut Butter: I prefer creamy, smooth peanut butter for an even, rich flavor that blends seamlessly into the batter. If you like a bit of crunch, swap in chunky, but watch out for extra texture that might affect the muffins’ rise.
- Flour: All-purpose is my go-to—trust me, whole wheat adds density and a nutty flavor, but it can make the muffins denser. Sift it well to keep the batter light and airy.
- Baking Powder: This is what gives the muffins their lift. I always double-check to ensure it’s fresh—no one wants flat muffins that don’t rise.
- Eggs: They bind everything together and add moisture. For a vegan version, try flax eggs, but be aware they might give a slightly denser crumb.
- Sweetener: Brown sugar adds a cozy, molasses note that complements the peanut butter. Honey works too, giving a touch of floral sweetness and a sticky, chewy texture.
- Milk: I use whole milk for richness, but almond or oat milk can be good substitutes, especially if you want a dairy-free muffin. The batter should be thick but stirrable—if it’s too stiff, loosen it with a splash more milk.
- Optional Add-ins: Chocolate chips or chopped nuts can make these muffins even more tempting. Mix them in gently—don’t overwhelm the batter, or they might sink or make the muffins dense.
Spotlight on key ingredients
Eggs: They bind everything together and add moisture. For a vegan version, try flax eggs, but be aware they might give a slightly denser crumb.:
- Peanut Butter: I prefer creamy, smooth peanut butter for an even, rich flavor that blends seamlessly into the batter. If you like a bit of crunch, swap in chunky, but watch out for extra texture that might affect the muffins’ rise.
- Flour: All-purpose is my go-to—trust me, whole wheat adds density and a nutty flavor, but it can make the muffins denser. Sift it well to keep the batter light and airy.
- Baking Powder: This is what gives the muffins their lift. I always double-check to ensure it’s fresh—no one wants flat muffins that don’t rise.
Notes for ingredient swaps
- Dairy-Free: Swap regular milk for almond or oat milk. It keeps the batter moist but may slightly mute richness.
- Nut Butter: Use sunbutter or tahini if peanut allergies are a concern. Expect a different aroma and flavor profile.
- Sweetener: Maple syrup or agave nectar can replace brown sugar for a subtler sweetness and a hint of caramel.
- Flour: Whole wheat or spelt flour can be used, but expect a denser crumb and a slightly nuttier flavor.
- Add-ins: Dried fruit or coconut flakes work well here—add them gently to avoid sinking or overloading the batter.
- Eggs: Flax or chia eggs are good vegan options, but they may give a denser, slightly rubbery texture.
- Chocolate Chips: Use dark chocolate, milk chocolate, or omit entirely for a more wholesome muffin experience.
Equipment & Tools
- Mixing bowls: To combine dry and wet ingredients separately.
- Muffin tin: Holds the batter for baking into individual muffins.
- Spatula: To fold ingredients gently and spread batter evenly.
- Oven thermometer: To ensure precise oven temperature for even baking.
- Toothpick: To test doneness of the muffins.
Step-by-step guide to peanut butter muffins
- Gather all your equipment: mixing bowls, muffin tin, spatula, and an oven-safe thermometer. Preheat your oven to 180°C (350°F).
- In a large bowl, whisk together 1 1/2 cups all-purpose flour, 1 teaspoon baking powder, and a pinch of salt. Set aside.
- In another bowl, combine 1/2 cup creamy peanut butter, 1/2 cup brown sugar, and 2 large eggs. Mix until smooth and slightly fluffy, about 2 minutes.
- Gradually add 1/2 cup milk (dairy or plant-based), stirring constantly. The batter should be thick but stirrable—add more milk if too stiff.
- Fold in 1/2 cup chocolate chips or chopped nuts if using. Gently incorporate without overmixing to keep the muffins light.
- Spoon the batter into a greased or lined muffin tin, filling each cup about 3/4 full. Smooth the tops with the back of a spoon.
- Bake for 18-20 minutes. Check for doneness by inserting a toothpick into the center; it should come out clean. The muffins will be golden and smell toasted with a nutty aroma.
- Remove from oven and let sit in the tin for 5 minutes. Then transfer to a cooling rack or plate. Rest for at least 10 minutes before serving to allow flavors to settle.
Let the muffins cool in the tin for 5 minutes, then transfer to a wire rack. Serve warm or at room temperature. For best flavor, enjoy within 2 days or freeze for later.
How to Know It’s Done
- The top should be golden brown and slightly crackly.
- A toothpick inserted into the center should come out clean or with moist crumbs, not wet batter.
- The muffins should feel firm but spring back lightly when gently pressed.
Peanut Butter Muffins
Ingredients
Equipment
Method
- Preheat your oven to 180°C (350°F) and line your muffin tin with paper liners or lightly grease it.
- In a large mixing bowl, whisk together the flour, baking powder, and salt until evenly combined. This creates a light, airy base for your muffins.
- In a separate bowl, combine the creamy peanut butter, brown sugar, and eggs. Use a spatula or whisk to blend until the mixture is smooth, slightly fluffy, and fragrant with roasted peanut aroma.
- Gradually add the milk to the peanut butter mixture, stirring constantly. The batter should become thick but stirrable—if it feels too stiff, add a splash more milk until it reaches a smooth, scoopable consistency.
- Gently fold in the chocolate chips or chopped nuts, if using. Be careful not to overmix, to keep the muffins tender and light.
- Spoon the batter into the prepared muffin cups, filling each about three-quarters full. Use the back of a spoon to smooth the tops if needed.
- Bake for 18-20 minutes, or until the muffins are golden on top and a toothpick inserted into the center comes out clean. The kitchen will fill with a warm, nutty aroma as they bake.
- Remove the muffins from the oven and let them sit in the tin for about 5 minutes. Then transfer them to a wire rack or plate and let cool slightly before serving.
- Enjoy these warm or at room temperature. They’re perfect with a glass of milk or a steaming cup of coffee for a cozy morning treat.
Pro tips for perfect muffins
- Use room temperature eggs to ensure even mixing and better rise.
- When scooping batter, fill muffin cups just 3/4 full to prevent overflow.
- Gently tap the muffin tin on the counter before baking to settle the batter and eliminate air pockets.
- For a richer flavor, toast your nuts or chocolate chips before folding them in.
- Keep an eye on the muffins during the last 2 minutes—overbaking turns them dry and crumbly.
- Use a toothpick inserted in the center—if it comes out moist but clean, they’re done.
- Let the muffins rest in the tin for 5 minutes after baking to finish setting before transferring to a rack.
Common mistakes and how to fix them
- FORGOT to check oven temperature → Use an oven thermometer for accuracy.
- DUMPED in too much flour → Measure carefully to avoid dense muffins.
- OVER-TORCHED the muffins → Remove when golden and a toothpick comes out clean.
- MISSED mixing wet and dry ingredients properly → Gently fold to keep batter light.
Quick fixes and pantry swaps
- When batter looks too stiff → Splash in a little more milk and gently fold.
- If muffins turn out dry → Brush with a honey glaze while warm.
- Dumped in too much flour → Lighten with an extra splash of milk or yogurt.
- Over-torched edges → Shield with foil and lower oven temperature slightly.
- When muffins sink in the middle → Check oven temp and avoid opening door early.
Prep, store, and reheat tips
- Prepare the dry ingredients—measure and whisk together—up to a day in advance. Store in an airtight container to keep them dry and fresh.
- Assemble the wet ingredients, like measuring and mixing the peanut butter and eggs, earlier in the day. Keep refrigerated if not baking immediately.
- Baked muffins can be stored in an airtight container at room temperature for up to 2 days, with a soft, slightly chewy texture that’s still tasty. For longer storage, refrigerate for up to a week or freeze for 1-2 months.
- Reheat muffins in a warm oven (around 160°C/320°F) for 5-8 minutes until they’re warm and fragrant again. They’ll regain some of that freshly baked softness and aroma.
- Freezing muffins individually wrapped preserves their moisture and flavor. Thaw at room temperature or warm briefly in the oven, and enjoy that gooey, peanutty scent.
Top questions about peanut butter muffins
1. Can I use chunky peanut butter?
Use creamy peanut butter for a smooth, even texture that blends seamlessly into the batter. Chunky can add crunch, but might make the muffins denser.
2. Can I swap peanut butter for other nut butters?
Yes, you can substitute almond or cashew butter, but expect a slightly different flavor and a less pronounced nutty aroma.
3. How do I make these dairy-free?
For a dairy-free version, replace regular milk with almond, oat, or soy milk. The muffins will be slightly less rich but still moist.
4. How do I know when the muffins are done?
Bake until the tops are golden and a toothpick inserted in the center comes out clean. Usually 18-20 minutes at 350°F (180°C).
5. Should I overmix the batter?
Overmixing can make muffins tough. Mix just until ingredients are combined to keep them light and tender.
6. How should I store leftovers?
Store baked muffins in an airtight container for up to 2 days at room temperature, or freeze for longer storage.
7. How do I reheat muffins?
To reheat, warm in a 320°F (160°C) oven for about 5 minutes until fragrant and soft again.
8. What’s the best way to test if they’re done?
Use a toothpick to check doneness; it should come out clean with moist crumbs attached. Muffins should be golden and slightly cracked on top.
9. Why do my muffins sink in the middle?
If muffins sink in the middle, ensure your oven temperature is accurate and avoid opening the oven door too early during baking.
10. Can I add ingredients like nuts or chocolate chips?
For a richer flavor, toast nuts or chocolate chips before folding them into the batter for added aroma and crunch.
These peanut butter muffins are more than just a quick treat; they capture a moment of kitchen improvisation turned comfort. The smell of toasted peanut aroma filling the room makes mornings feel a little softer, a little more intentional. It’s funny how a simple ingredient can carry so much warmth and nostalgia.
No matter how busy the day, baking these offers a small pause—a chance to enjoy something genuinely homemade. They’re perfect for sharing or keeping all to yourself, with that lingering nutty scent as a reminder of the simple joys in everyday baking.

Hi, I’m Benjamin Reynolds, the creator behind Strategically Seasoning. I started this blog because I believe great cooking is not random. It is thoughtful. It is intentional. It is built step by step with purpose. Seasoning is not something you sprinkle at the end and hope for the best. It is a strategy.

