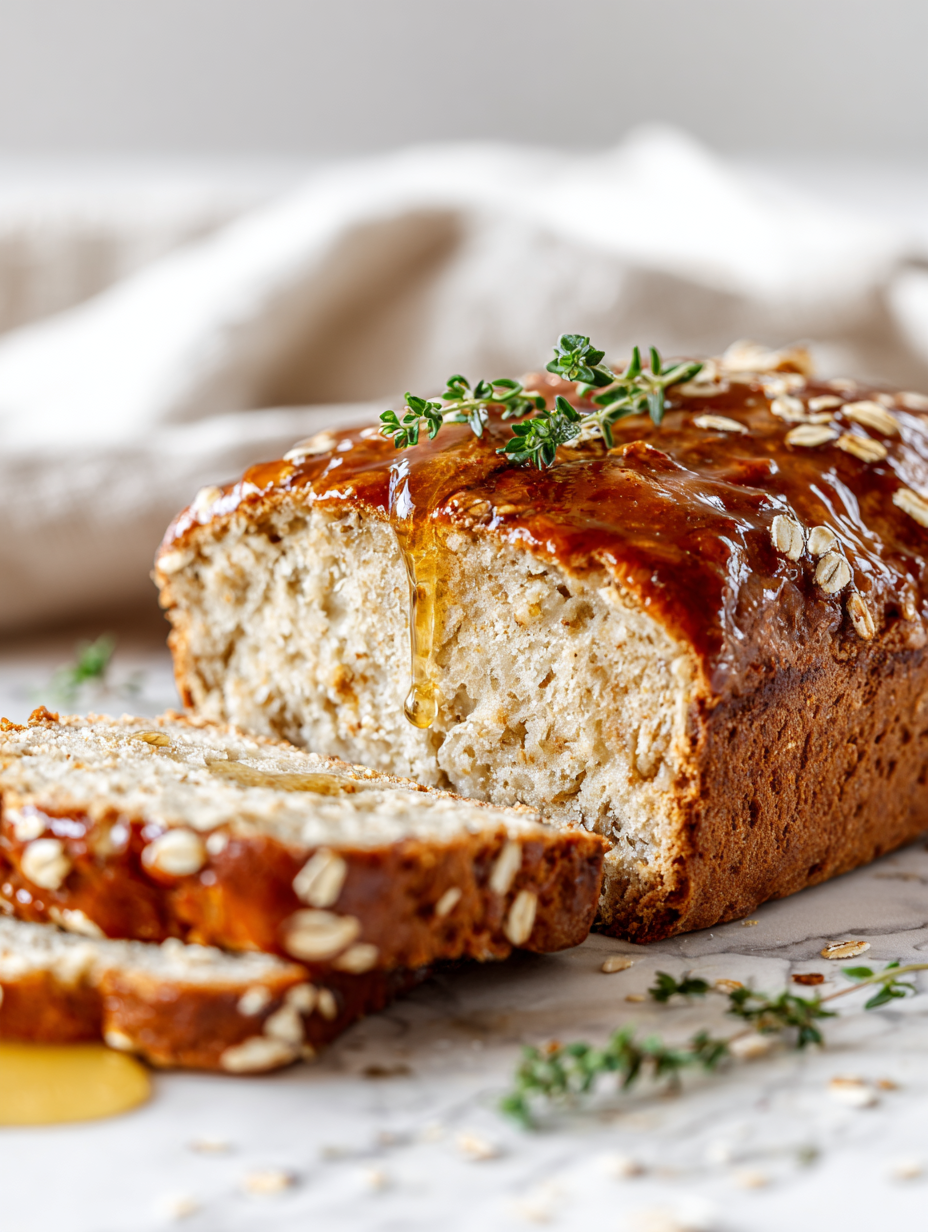
Honey and oats aren’t just breakfast staples; they’re the backbone of this bread’s charm. There’s a quiet nostalgia in the slightly chewy oats and the sweet, golden honey that whispers of mornings past. Baking it feels like a small act of comfort, a way to hold onto slower, simpler moments.
What surprised me the most was how the honey subtly elevates the loaf, giving it a gentle sweetness that pairs perfectly with the hearty oats. It’s rustic but refined, cozy but sophisticated enough to serve alongside a fancy cheese or just a smear of butter. Each slice feels like a tiny, sweet hug—familiar yet special.
Focusing on how honey and oats create a bread that’s both nostalgic and unexpectedly sophisticated, blending rustic charm with subtle sweetness and texture.
Rustic sweetness with a hearty twist
- Baking this bread feels like a small act of rebellion against ultra-processed snacks—something real and grounding about kneading dough and smelling oats toast up.
- The first warm slice, with melting butter, triggers a rush of childhood mornings—simple, honest, a little messy, but so comforting.
- Seeing the honey swirl into the dough, I get a tiny thrill—like capturing a fleeting moment of sweetness in a rough-around-the-edges loaf.
- There’s pride in making bread that’s hearty enough for breakfast but refined enough for a weekend brunch—kind of a versatile winner.
- It’s the kind of recipe that reminds me to slow down, really notice the smell of oats and honey mingling in the oven’s warm air.
Story Behind This Bread
- I stumbled upon this honey oat bread recipe during a cluttered weekend baking spree, looking for something that felt both straightforward and special. The smell of toasted oats mixed with honey bubbling in the oven instantly took me back to childhood mornings, but with a grown-up twist. It’s become my go-to when I want a loaf that’s comforting yet a little refined, perfect for lazy weekends or a quiet breakfast treat.
- Sometimes, I think about how this bread connects me to my grandmother’s kitchen, where simple ingredients were transformed into something soulful. Baking it feels like a small act of preserving that memory—crunchy oats, golden honey, and the warm aroma filling the house. It’s a reminder that good bread, like good stories, is often rooted in humble beginnings.
- heading
- Story Behind This Bread
Historical & Cultural Notes
- Honey oat bread has roots in rustic European baking traditions, where oats were a staple grain often mixed with local honey for sweetness.
- During the Great Depression, honey and oats became popular ingredients for affordable, filling bread that used pantry staples.
- Oats, once considered a poor man’s grain in some cultures, gained popularity in bread making during the health food movement of the 20th century.
- The combination of honey and oats in bread is often associated with farmhouses and cozy, communal baking in rural communities.
- Ancient grains like oats have been cultivated for thousands of years, but their integration into bread recipes gained momentum with modern artisanal baking.
Breakdown of Key Ingredients
- Honey: I love how honey adds a golden hue and a gentle, floral sweetness—if you want a milder touch, swap with agave syrup but lose some of that honeyed aroma.
- Oats: Using rolled oats gives a hearty texture, but steel-cut oats can work if soaked first—they’ll add a nuttier crunch and a more rustic bite.
- Flour: I prefer bread flour for structure, but whole wheat adds depth and nuttiness—just expect a denser crumb and maybe a touch more liquid.
- Yeast: Active dry yeast is my go-to, yet instant yeast speeds things up without sacrificing rise—just adjust the proofing time slightly.
- Salt: It’s crucial for flavor and gluten development—skip it or reduce it, and the bread might taste flat or be overly dense.
- Butter: A bit of butter enriches the dough, making it softer and richer—sub with coconut oil if you want dairy-free, but it’ll change the flavor profile.
- Water: Lukewarm water (around 40°C/105°F) activates the yeast perfectly—if it’s too hot, it’ll kill the yeast; too cold, it’ll slow everything down.
Spotlight on key ingredients
Honey:
- I love how honey adds a golden hue and a gentle, floral sweetness—if you want a milder touch, swap with agave syrup but lose some of that honeyed aroma.
- Oats: Using rolled oats gives a hearty texture, but steel-cut oats can work if soaked first—they’ll add a nuttier crunch and a more rustic bite.
Oats:
- Rolled oats absorb liquid easily and toast up to a slightly chewy, nutty flavor that’s essential for texture.
- If you prefer a more rustic, coarse texture, steel-cut oats can be used, but soak them first for better integration.
Notes for ingredient swaps
- Honey-Free: Swap honey for maple syrup or agave nectar for a similar sweetness, but expect a slightly different aroma and depth.
- Gluten-Free: Use a gluten-free flour blend and add xanthan gum; the texture will be denser and more crumbly, but still tasty.
- Dairy-Free: Replace butter with coconut oil or vegan margarine; keep an eye on the dough’s moisture, it might need a splash more water.
- Oats: Steel-cut oats can substitute rolled oats if soaked first—expect a nuttier crunch and more rustic chew.
- Flour: Whole wheat flour adds nuttiness and density—reduce the water slightly to compensate for the extra bran’s absorbency.
- Yeast: Instant yeast can replace active dry yeast—no proofing needed, just mix directly into dry ingredients.
- Sweetener: Light brown sugar can stand in for honey in a pinch, adding a caramel note but less floral aroma.
Equipment & Tools
- Large mixing bowl: For combining and kneading dough
- Dough scraper: To help knead and shape the dough
- Loaf pan (9×5 inch): To shape and bake the bread
- Oven: For baking the loaf
- Wire rack: To cool the bread evenly
Step-by-step guide to Honey Oat Bread
- Equip a large mixing bowl, a dough scraper, and a loaf pan (9×5 inch). The bowl is for mixing, scraper for kneading, pan for baking.
- In the bowl, combine 3 cups bread flour, 1 cup rolled oats, 1 teaspoon salt, and 2 teaspoons active dry yeast. Mix well.
- Warm 1 cup water to about 40°C (105°F). Add 2 tablespoons honey, stir until dissolved. Pour into dry ingredients.
- Add 2 tablespoons melted butter to the mixture. Stir with a spoon until a shaggy dough forms, then switch to your hands.
- Knead the dough in the bowl or on a lightly floured surface for about 8 minutes. It should become smooth and slightly tacky.
- Cover the bowl with a damp cloth or plastic wrap. Let it rise in a warm spot (around 24°C/75°F) for 1 hour, until doubled.
- Gently punch down the dough. Turn it onto a floured surface and shape into a loaf. Place in the greased loaf pan.
- Cover loosely again and let rise for another 30-45 minutes, until it puffs just above the rim of the pan.
- Preheat your oven to 180°C (350°F). Bake the loaf on the middle rack for about 35-40 minutes.
- Check for a golden-brown crust. The bread should sound hollow when tapped on the bottom. If not, bake a few more minutes.
- Remove the bread from oven. Let it cool in the pan for 10 minutes, then transfer to a wire rack for at least 20 minutes.
- Rest the bread at room temperature. This helps set the crumb and makes slicing easier and neater.
Allow the bread to cool completely on a wire rack before slicing. This prevents sogginess and makes for cleaner cuts. Serve warm or at room temperature, with butter or jam if desired.
How to Know It’s Done
- Loaf has a golden-brown crust and sounds hollow when tapped.
- Internal temperature reaches about 96°C (205°F).
- Crumb feels airy and slightly chewy, with oats visible throughout.
Honey Oat Bread
Ingredients
Equipment
Method
- In a large mixing bowl, combine the bread flour, toasted oats, salt, and active dry yeast. Mix until evenly distributed.
- Warm the water until it’s just about 40°C (105°F), then stir in the honey until dissolved.
- Pour the honey water into the dry ingredients, then add the melted butter. Stir with a spoon until the mixture begins to come together into a shaggy dough.
- Using your hands, knead the dough in the bowl or on a lightly floured surface for about 8 minutes until it feels smooth, slightly tacky, and elastic.
- Cover the bowl with a damp cloth or plastic wrap, and let the dough rise in a warm spot for about 1 hour, or until doubled in size.
- Gently punch down the dough to release excess gas, then turn it onto a floured surface and shape into a loaf. Place it in a greased loaf pan.
- Cover the loaf loosely and let it rise for another 30-45 minutes until it puffs just above the rim of the pan.
- Preheat your oven to 180°C (350°F). Bake the loaf on the middle rack for 35-40 minutes until the crust is golden brown and sounds hollow when tapped.
- Remove the bread from the oven and transfer it to a wire rack. Let it cool completely for at least 20 minutes before slicing.
- Slice and serve the bread warm or at room temperature, enjoying its hearty texture and subtle sweetness.
Pro tips for perfect Honey Oat Bread
- Use bread flour for a strong gluten network that traps gases for a better rise.
- Toast oats lightly before mixing to enhance their nutty flavor and aroma.
- Add honey gradually to warm water to ensure it dissolves completely and activates the yeast.
- Knead until the dough is smooth and slightly tacky—don’t overwork or underdevelop gluten.
- Use an instant-read thermometer to check for proper internal temperature, around 96°C (205°F).
- Cover the dough during rising to maintain humidity and prevent a dry crust from forming.
- Cool the bread completely on a wire rack before slicing for cleaner cuts and even crumb.
Common mistakes and how to fix them
- FORGOT to account for oats absorbing extra moisture → add more water or reduce flour slightly.
- DUMPED yeast directly into salted flour → proof yeast first in warm water with honey.
- OVER-TORCHED crust → lower oven temperature or cover with foil halfway through baking.
- UNDER-proofed dough → give it extra time to double in size before baking.
Quick Fixes and Pantry Swaps
- IF bread is dense, splash a little more water into the dough and knead gently.
- WHEN bread cracks excessively, patch with a thin layer of dough and cover with foil.
- DUMPED too much honey? Shield the crust with foil halfway through baking to prevent burning.
- IF loaf is undercooked inside, rescue with a 5-minute extra bake at 180°C (350°F).
- WHEN oats shimmer in the dough, swap with a handful of sesame seeds for a nutty twist.
Prep, store, and reheat tips
- Prep the dough up to the second rise the day before; refrigerate it overnight for a slow, flavorful fermentation.
- Store cooled bread tightly wrapped in plastic or foil at room temperature for up to 2 days; it retains softness and flavor.
- For longer storage, freeze slices or the whole loaf wrapped in foil and an extra layer of plastic, up to 1 month; defrost and rewarm gently.
- Reheat in a 180°C (350°F) oven for about 10 minutes until warm and fragrant, with a slightly crispy crust; avoid overheating to prevent dryness.
- Refrigerated bread may develop a drier crumb; refresh by briefly warming and lightly spritzing with water before reheating.
Top questions about Honey Oat Bread
1. Can I use different types of oats?
You can use rolled oats or quick oats; rolled oats give a chewier texture and more rustic look.
2. Can I substitute honey with anything else?
Yes, honey adds sweetness and helps with browning; maple syrup is a good substitute, but the flavor will be slightly different.
3. How do I know when the bread is fully baked?
The bread is done when it sounds hollow when tapped and reaches about 96°C (205°F) internally.
4. Can I use whole wheat flour instead of bread flour?
Use bread flour for a good rise; whole wheat adds nuttiness but makes it denser. Adjust water accordingly.
5. Should I let the bread cool before slicing?
Let the bread cool completely on a wire rack before slicing; this prevents sogginess and helps set the crumb.
6. How should I store and reheat leftovers?
You can freeze the bread wrapped tightly for up to 1 month; reheat in the oven for best texture.
7. What water temperature is best for activating yeast?
Use warm water (around 40°C/105°F) to activate the yeast; too hot kills it, too cold slows fermentation.
8. What if my dough over-proofed?
Over-proofed bread can be deflated gently and baked for a few extra minutes to fix it.
9. What if the dough is too dry or sticky?
Add a splash more water if the dough is too dry; reduce flour slightly or knead longer if too sticky.
10. How should I slice the bread for best results?
Use a sharp serrated knife for clean slices; let the bread cool fully for easier cutting and neat presentation.
Baking this honey oat bread feels like a small act of kindness—something grounding and familiar, especially now. The warm aroma of honey and toasted oats fills the house, making every moment of waiting worthwhile. When you finally slice into it, that tender crumb and slightly chewy crust remind you that simple ingredients can turn into something truly satisfying.
It’s a loaf that invites slow mornings and casual gatherings alike, offering comfort without fuss. Each bite carries a bit of nostalgia, balanced with the pride of having made it yourself. Sometimes, the best recipes are the ones that make you pause and appreciate the humble beauty of good bread.

Hi, I’m Benjamin Reynolds, the creator behind Strategically Seasoning. I started this blog because I believe great cooking is not random. It is thoughtful. It is intentional. It is built step by step with purpose. Seasoning is not something you sprinkle at the end and hope for the best. It is a strategy.

