Making date bars at home is one of those baking projects that starts off seeming simple but quickly turns into a delightful chaos. There’s something about chopping sticky, caramelized dates and trying to roll out dough without it sticking everywhere that feels both frustrating and oddly satisfying. It’s a bit like life—imperfect, a little messy, but full of small, sweet triumphs.
This recipe is rooted in the messy, honest moments I remember from my childhood kitchen—sliding bars into the oven while rushing to get dinner on the table or sneaking a bite of warm, sticky date mixture straight from the spoon. There’s a nostalgic rush in those moments, a reminder that baking isn’t about perfection but about capturing a fleeting, heartfelt moment in time.
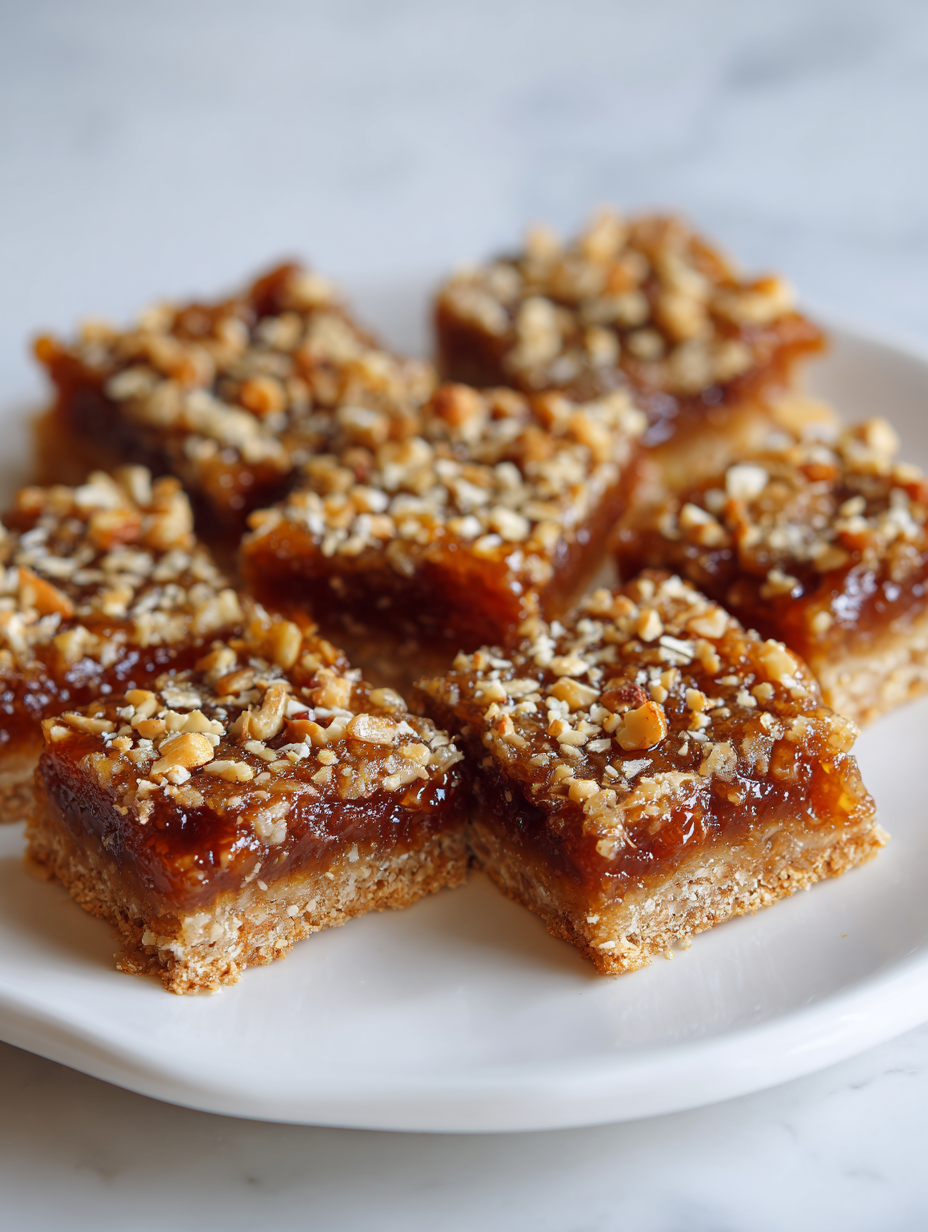
The best part? Despite the chaos, these date bars turn out rich, chewy, and deeply satisfying. They’re not polished, but they’re honest—just like the best memories, full of flavor and a little bit of chaos.
Focusing on the nostalgic and slightly chaotic process of making homemade date bars with a personal touch, emphasizing imperfect but heartfelt baking moments.
The story behind this recipe
- This recipe came together on a rainy afternoon when I was rummaging through my grandmother’s old recipe box. I found a worn-out clipping for date bars, scribbled in her shaky handwriting, and decided to give it a shot. Baking these feels like a quiet act of connection to her, even if I don’t quite stick to the original in every way.
- Chopping those sticky, caramelized dates always feels like a small adventure—sometimes more goo on my fingers than on the cutting board. It’s a reminder that the best baking moments often happen in the chaos, not the perfection. These bars became a sort of therapy, a way to slow down and savor a tiny, sweet victory.
- Every batch feels a little different—more caramel-y, less sticky, maybe a pinch more cinnamon. But that’s part of the charm, right? These date bars are honest, a little messy, and full of that nostalgic, homemade warmth that I keep coming back to.
Ingredient breakdown
- Dates: I love the deep, caramel-like sweetness of Medjool dates—make sure they’re soft and gooey before chopping, or they’ll fight you. Swap with dried apricots if you want a tangier touch.
- Butter: Using good, real butter gives these bars a rich, melt-in-your-mouth texture. If you need dairy-free, coconut oil works but adds a coconut aroma and slightly different crumb.
- Oats: Old-fashioned rolled oats are best for chewiness, but quick oats can be used in a pinch—just expect a slightly softer bite. Toast the oats lightly for extra flavor.
- Sweetener: Brown sugar adds a warm, molassy note that pairs beautifully with dates. Maple syrup can be a good swap, lending a subtle smoky sweetness—just cut back a bit on the liquid.
- Spices: A pinch of cinnamon elevates the whole thing with cozy warmth. Nutmeg or ginger can be added if you’re feeling adventurous, giving a more complex aroma.
- Flour: All-purpose flour keeps the crust tender and sturdy. Almond flour can replace some of it for a nuttier flavor, but the texture will be a tad denser.
- Vanilla extract: Just a splash enhances all the deep, toasty flavors. Vanilla bean paste adds little flecks of flavor and visual charm—don’t skip it if you have some.
Spotlight on key ingredients
Dates:
- I love the deep, caramel-like sweetness of Medjool dates—make sure they’re soft and gooey before chopping, or they’ll fight you. Swap with dried apricots if you want a tangier touch.
- Their sticky, oozy texture during cooking releases a rich, sweet aroma that fills the kitchen. Watch for a glossy, jam-like consistency as they soften.
Butter:
- Using good, real butter gives these bars a rich, melt-in-your-mouth texture. If you need dairy-free, coconut oil works but adds a coconut aroma and slightly different crumb.
- When melted, it creates a fragrant, golden base that crisps up the topping perfectly. Keep an eye on it to prevent browning too quickly or burning.
Notes for ingredient swaps
- Dates: I prefer Medjool for their rich, caramel sweetness and soft texture—swap with dried figs if you want a milder, less sticky alternative.
- Butter: Real butter adds a tender crumb and rich flavor—coconut oil is a good dairy-free option but offers a more pronounced aroma.
- Oats: Old-fashioned rolled oats give the best chewy texture—quick oats will work but make the crust softer and less hearty.
- Sweetener: Brown sugar imparts a warm, caramel note—maple syrup can be substituted for a smoky, nuanced sweetness, just reduce the liquid slightly.
- Spices: Cinnamon adds cozy warmth—nutmeg or ginger can be added for a more complex, aromatic profile, but use sparingly.
- Flour: All-purpose flour keeps the crust tender—almond flour can replace part for nuttiness but makes the texture denser.
- Vanilla: Vanilla extract brightens all flavors—vanilla bean paste adds visual interest and a deeper aroma if you have it.
Equipment & Tools
- 9-inch square baking pan: To bake the crust and assembled bars.
- Mixing bowls: To combine the crust ingredients and toppings.
- Saucepan: To cook the date filling and melt butter.
- Spatula: To spread and smooth the filling and toppings.
- Sharp knife: To slice the cooled bars.
- Parchment paper: To prevent sticking and make removal easier.
Step-by-step guide to date bars
- Preheat your oven to 180°C (350°F). Grease a 9-inch square baking pan or line it with parchment paper for easy removal.
- Prepare the crust: In a mixing bowl, combine 1 1/2 cups rolled oats, 1 cup all-purpose flour, 1/2 cup brown sugar, and a pinch of salt. Melt 1/2 cup butter and pour over mixture. Mix until crumbly but holds together when pressed.
- Press the crust evenly into the prepared pan. Bake for 12-15 minutes until lightly golden and fragrant. Set aside to cool slightly.
- Meanwhile, make the date filling: Pit and chop 1 1/2 cups Medjool dates, aiming for small, sticky pieces. In a small saucepan, melt 2 tablespoons butter over medium heat. Add dates and cook, stirring often, for about 5 minutes until softened and fragrant. Stir in 1 teaspoon vanilla extract and a pinch of cinnamon. Remove from heat and let cool for a few minutes.
- Spread the warm date mixture evenly over the baked crust. Use the back of a spoon to smooth it out. The filling should be gooey and slightly sticky but not runny.
- Prepare the topping: In a small bowl, combine 1/2 cup rolled oats, 2 tablespoons brown sugar, and a pinch of salt. Melt 1 tablespoon butter and stir into the mixture. Sprinkle evenly over the date filling.
- Bake the assembled bars for an additional 20-25 minutes, until the topping is golden and crisp, and the filling is bubbling at the edges. The top should crackle slightly when done.
- Remove from oven and let cool completely in the pan on a wire rack, about 1 hour. The bars will firm up as they cool.
- Once cooled, lift the bars out using the parchment edges or cut directly in the pan. Slice into squares with a sharp knife. Let sit for 10 minutes before serving to allow the filling to set.
- Serve at room temperature or slightly warmed. These bars are best enjoyed within 3 days—store in an airtight container at room temp or in the fridge for up to a week.
Allow the bars to cool completely in the pan, then lift out with parchment. Slice into squares. Serve at room temperature or warmed slightly for a gooey experience.
How to Know It’s Done
- Crust is golden and firm when baked.
- Date filling is bubbling and fragrant, not runny.
- Top is crisp and golden, with a crackle sound when tapped.
Homemade Date Bars
Ingredients
Equipment
Method
- Preheat your oven to 180°C (350°F). Line a 9-inch square baking pan with parchment paper, leaving some overhang for easy removal.
- In a mixing bowl, combine the toasted oats, flour, brown sugar, and a pinch of salt. Pour in melted butter and stir until the mixture is crumbly but holds together when pressed.
- Press this crust mixture evenly into the prepared pan, creating a compact layer. Bake for 12-15 minutes until lightly golden and fragrant, then remove and set aside to cool slightly.
- While the crust bakes, pit and chop the Medjool dates into small sticky pieces. In a saucepan, melt 2 tablespoons of butter over medium heat. Add the chopped dates and cook, stirring often, for about 5 minutes until they soften and release a caramel aroma.
- Stir in vanilla extract and cinnamon, then remove from heat. Let the mixture cool for a few minutes until it thickens slightly but remains spreadable.
- Spread the warm, thickened date mixture evenly over the baked crust, smoothing it out with the back of a spoon until level.
- Mix additional rolled oats, brown sugar, and a pinch of salt in a small bowl. Melt the remaining butter and stir it into the topping mixture until crumbly.
- Sprinkle the crunchy topping evenly over the spread-out date filling, covering it completely.
- Bake the assembled bars for another 20-25 minutes until the topping is golden brown and crisp, and the filling begins to bubble at the edges. The kitchen will fill with a warm, caramel aroma.
- Remove from the oven and let the bars cool completely in the pan on a wire rack for about an hour. This helps them set and makes slicing easier.
- Once cooled, lift the bars out using the parchment overhang. Slice into squares with a sharp knife, wiping the blade between cuts for clean edges. Serve at room temperature or warmed slightly for a gooey, satisfying treat.
Notes
Tips for perfect date bars
- Toast the oats lightly before mixing to bring out a nutty aroma and deepen flavor.
- When cooking the date mixture, simmer until it’s thick and jammy—avoid overcooking to prevent burning.
- Use a fork or pastry cutter to evenly distribute melted butter into the crust for a crumbly texture.
- Chill the assembled bars in the fridge for at least an hour—this helps the filling set and makes slicing cleaner.
- If the top starts to over-brown during baking, loosely tent with foil to prevent burning while maintaining crispness.
- For a more gooey filling, slightly underbake and let the bars rest; they firm up as they cool.
- When slicing, dip your knife in hot water to get clean, even cuts without sticking.
Common mistakes and how to fix them
- FORGOT to check oven temperature → Use an oven thermometer for accuracy.
- DUMPED too much flour → Measure carefully to avoid dry, crumbly bars.
- OVER-TORCHED the crust → Cover with foil if edges brown too quickly.
- MISSED the cooling step → Let bars cool completely for clean slicing and proper setting.
Quick fixes and pantry swaps
- When mixture is too sticky, splash a little water or oil to loosen it.
- If filling is too runny, dump in a few extra chopped dates or a teaspoon of cornstarch.
- Over-baked crust? Patch with a little melted butter and sugar for extra moisture.
- Shield edges if they brown too fast, preventing burnt tips while the middle finishes.
- When in doubt, rescue a burnt batch with a sprinkle of cinnamon sugar on top.
Prep, store, and reheat tips
- Preparing the crust and topping mixes ahead saves time; keep them in airtight containers for up to 2 days in the fridge.
- Chop the dates and make the filling the day before; store in a sealed jar or container for up to 24 hours, refrigerated.
- Bars can be baked and stored at room temperature in an airtight container for up to 3 days—refrigerate for longer shelf life, around 5-7 days.
- Reheat slices gently in the microwave for about 10-15 seconds until warm and gooey, watching for melting edges and fragrant sweetness.
- For longer storage, freeze bars wrapped tightly in plastic wrap and foil for up to 1 month; thaw at room temperature, and rewarm if desired, until fragrant and soft.
Top questions about date bars
1. How do I pick good dates?
Look for soft, pliable dates that are sticky and jammy—these yield the best flavor and texture. If they’re too dry, soak them in warm water for 10 minutes before chopping.
2. How do I know when the crust is done?
You want the crust to be golden and slightly firm when pressed. If it’s too soft or soggy, bake it a few extra minutes until it firms up and turns a light golden hue.
3. What should the date filling look like?
The date filling should be thick, shiny, and sticky—almost like caramel. If it’s too runny, cook it a bit longer, stirring constantly to evaporate excess moisture.
4. Can I use quick oats instead of rolled oats?
Use rolled oats for chewiness and a hearty texture. Quick oats can be used but will result in a softer, less chewy bar. Toast the oats lightly before mixing for extra flavor.
5. My bars are crumbly, what went wrong?
If your bars aren’t holding together, they might be underbaked or too soft. Chill them in the fridge for at least an hour, which helps the filling set and makes slicing easier.
6. How should I store date bars?
Store bars in an airtight container at room temperature for up to 3 days or in the fridge for up to a week. Reheat in microwave for 10-15 seconds until warm and gooey.
7. Can I make these vegan?
For a vegan version, substitute butter with coconut oil or vegan margarine. The texture remains tender, but expect a slight coconut aroma that complements the sweetness.
8. Can I customize the spices?
Yes, adding a pinch of ginger or nutmeg can bring extra warmth and depth to the flavor profile. Just add sparingly to avoid overpowering the natural sweetness.
9. What if the topping burns?
If the top browns too quickly while baking, tent the pan loosely with foil. This prevents burning while allowing the filling to cook through.
10. How do I know when the bars are done?
When the filling is bubbling at the edges, the top is crisp, and the bars are firm but not hard, they’re ready to come out of the oven and cool.
Making these date bars is a bit like capturing a messy, sweet snapshot of childhood—imperfect but full of flavor. They remind me that the best moments in baking and life are often unpolished and honest. Each batch is a small, sticky celebration of that truth, worth every messy spoonful and imperfect cut. When you finally get to enjoy one, it’s a quiet, sweet reward for all the chaos behind the scenes. Sometimes, that’s exactly what a good treat should be—a little chaotic, a little nostalgic, and deeply satisfying. Ready to keep experimenting with these? I say, go for it, and let the mess be part of the charm.
outro2”: [

Hi, I’m Benjamin Reynolds, the creator behind Strategically Seasoning. I started this blog because I believe great cooking is not random. It is thoughtful. It is intentional. It is built step by step with purpose. Seasoning is not something you sprinkle at the end and hope for the best. It is a strategy.

