When I first tried making these chocolate brownie cookies, I was chasing that perfect mix of crispy edges and a molten, gooey center. It’s a messy, delightful process that makes every batch feel like a small victory—crisp crackle on the outside, soft and rich inside. There’s a certain thrill in biting into one, where the textures clash and then melt into each other, creating a little chaos on your tongue.
This recipe isn’t about neatness or perfection. It’s about embracing the imperfect—slightly cracked tops, uneven edges, and oozing chocolate. I love how it captures the comfort of a brownie but with the handheld charm of a cookie. It’s a reminder that sometimes, the best things in life are a little messy and wonderfully unpredictable.
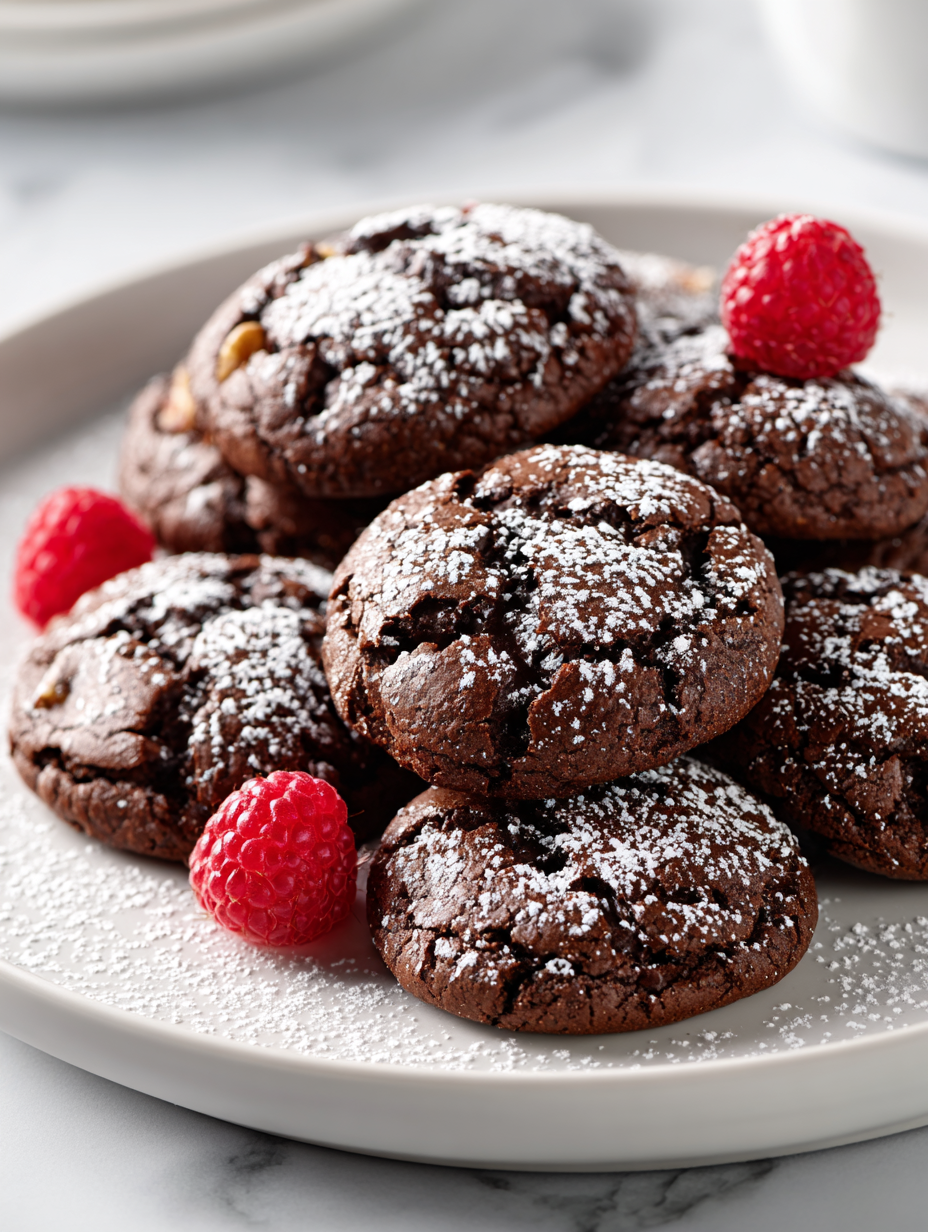
Focusing on the contrast between the crispy edges and gooey centers, this recipe celebrates the textural dance that makes chocolate brownie cookies irresistibly addictive.
The story behind this recipe
- A few years back, I was experimenting in my tiny kitchen, trying to combine my two favorite desserts—brownies and cookies. I wanted something that could give me that fudgy, chocolatey punch but in a portable, snackable form. The first batch was a disaster—flat, greasy, and tasting more like a chocolate pancake. But I kept tweaking, aiming for that perfect contrast of crispy edges and gooey centers, and finally, I hit on this recipe.
- These cookies remind me of lazy weekends spent with a box of dark chocolate and a mug of cold milk. They’re imperfect, just like real life—cracked tops, slightly uneven edges, and that oozy chocolate center. Every time I bake them, I get a little rush of pride, knowing I’ve captured a small, messy moment of joy that’s worth every oven scorch and flour spill.
- heading: ‘The story behind this recipe’
Key Ingredients and Tips
- Unsweetened cocoa powder: I like the intense, bitter depth it brings; skip the Dutch-processed if you want a more robust chocolate punch, but don’t go too sweet. Look for a deep, dark color and a rich aroma.
- Dark chocolate chunks: I prefer a mix of semi-sweet and bittersweet for that gooey, melty experience; chunky bits create delightful pockets of richness. Use a good-quality chocolate that melts smoothly and smells heavenly.
- Butter: I always use unsalted, room temp butter for even mixing and better flavor; it gives the cookies that tender, melt-in-mouth quality. If you’re out, margarine can work, but it won’t be quite as rich.
- Brown sugar: I lean on dark brown for a caramel-like note that adds complexity; don’t skimp here, it’s what keeps the centers moist and fudgy. It should be sticky and fragrant with molasses.
- Eggs: I use large eggs for consistency; they help bind the dough and give structure. If they’re slightly smaller, add a teaspoon of milk to compensate for moisture.
- All-purpose flour: I keep it light and avoid over-measuring—spoon gently and level off, or you risk tough cookies. Too much flour makes them cakey, so measure carefully.
- Vanilla extract: I love a splash of pure vanilla to round out the chocolate flavor; don’t skip this, even if it’s just a teaspoon. It brings a subtle warmth and depth that lingers after the bite.
Key Ingredients and Tips
Chocolate chunks:
- Dark chocolate chunks: I love the contrast of gooey pockets and crisp edges; use a mix of semi-sweet and bittersweet for depth. The aroma when melting is rich and intoxicating.
- Brown sugar: I rely on dark brown for that caramel-softness; it keeps the centers moist and fudgy. Its sticky, molasses scent is a giveaway of good quality.
Cocoa powder:
- Unsalted butter: I always opt for room temp butter to get that tender, melt-in-mouth texture. It melts smoothly and gives a cozy, buttery aroma during baking.
- I prefer Dutch-processed for a smooth, mellow chocolate flavor; it behaves differently during baking—sift well to avoid lumps and bitterness.
Notes for ingredient swaps
- Dairy-Free: Swap butter for coconut oil or dairy-free margarine. Expect slightly less richness and a different melt-in-mouth feel.
- Sugar Alternatives: Use coconut sugar or maple syrup instead of white or brown sugar. This adds a hint of caramel or maple flavor, but may affect texture slightly.
- Gluten-Free: Replace all-purpose flour with a blend of almond flour and gluten-free oat flour. Cookies may be a bit crumblier but just as delicious.
- Vegan Option: Substitute eggs with flaxseed meal or applesauce. The cookies will be slightly denser but still satisfy that chocolate craving.
- Extra Bitterness: Add a pinch of sea salt or smoked salt to enhance chocolate depth. It makes the flavor pop and balances sweetness.
- Chocolate Variations: Use white chocolate chunks or milk chocolate if dark isn’t your thing. Each brings a different sweetness and meltiness.
- Flavor Boost: Mix in a teaspoon of espresso powder or cinnamon. A little spice or depth can make the chocolate sing even more.
Equipment & Tools
- Double boiler or microwave-safe bowl: To melt chocolate and butter gently without burning.
- Mixing bowls: To combine wet and dry ingredients thoroughly.
- Whisk: To beat eggs and sugar until light and frothy.
- Sifter: To aerate cocoa and flour, ensuring no lumps.
- Baking sheet: To hold cookies during baking, lined with parchment for easy removal.
- Wire rack: To cool baked cookies evenly, preventing sogginess.
- Spoons or cookie scoop: To portion dough evenly for uniform cookies.
Step-by-step guide to baking
- Gather all ingredients: butter, eggs, sugar, cocoa, chocolate, flour, vanilla. Preheat oven to 180°C (350°F). Line a baking sheet with parchment paper.
- Melt the butter and half of the chopped chocolate in a heatproof bowl over a double boiler or microwave in short bursts, stirring until smooth. Let it cool slightly.
- In a mixing bowl, whisk together the eggs and sugar until well combined and slightly frothy, about 2 minutes.
- Pour the cooled chocolate-butter mixture into the egg-sugar mixture. Add vanilla extract. Mix until smooth.
- Sift the cocoa powder and flour into the wet ingredients. Fold gently until just combined; don’t overmix, batter should be thick and fudgy.
- Fold in the remaining chopped chocolate chunks. The batter will be dense and sticky—this is what gives the cookies their gooey centers.
- Spoon heaping tablespoons of dough onto the prepared baking sheet, spacing about 5 cm (2 inches) apart. Slightly flatten each mound with the back of the spoon.
- Bake for 10-12 minutes. The edges should be set but the centers still look slightly soft and shiny. The top will crack and darken.
- Remove from oven and let sit on the baking sheet for 5 minutes. Then transfer to a wire rack to cool for at least 10 minutes. Cookies will firm slightly but stay gooey inside.
- For best texture, serve warm or at room temperature. The edges should be crispy, the middle irresistibly melty. If they get too firm, microwave for 10–15 seconds before serving.
Let cookies cool on the rack for at least 10 minutes to set the centers. Serve warm for gooey texture or at room temp for a firmer bite. Plate with a dusting of cocoa or a drizzle of melted chocolate for presentation.
How to Know It’s Done
- Edges are crisp and golden, centers are soft and shiny.
- A toothpick inserted in the center comes out with moist crumbs, not wet batter.
- The tops crack and darken, indicating doneness and a chewy, fudgy interior.
Chocolate Brownie Cookies
Ingredients
Equipment
Method
- Melt the butter and half of the chopped dark chocolate together in a double boiler or microwave-safe bowl, stirring until smooth and glossy. Let it cool slightly, until just warm and fragrant.
- In a separate bowl, whisk the eggs and dark brown sugar until the mixture is pale, thick, and slightly frothy—about 2 minutes. This adds lightness and helps incorporate air into the batter.
- Pour the slightly cooled chocolate-butter mixture into the egg-sugar mixture, stirring gently to combine. Add the vanilla extract and mix until smooth and homogeneous.
- Sift the cocoa powder and flour into the wet mixture to prevent lumps, then gently fold everything together with a spatula until just combined. The batter will be thick and fudgy—don't overmix to keep it tender.
- Fold in the remaining chopped chocolate chunks, distributing them evenly throughout the batter. This creates gooey pockets of melted chocolate inside each cookie.
- Spoon heaping tablespoons of dough onto a parchment-lined baking sheet, spacing them about 2 inches apart. Slightly flatten each mound to encourage even spreading.
- Bake the cookies in a preheated oven at 180°C (350°F) for 10 to 12 minutes. They’ll crack on top and the edges will be set, but the centers should still look slightly soft and glossy.
- Remove the baking sheet from the oven and let the cookies rest for 5 minutes. They will continue to set as they cool, developing that perfect crispy edge and gooey center.
- Transfer the cookies to a wire rack and cool for at least 10 minutes. This allows the centers to firm up slightly while remaining irresistibly soft and melty inside.
- Serve these cookies warm or at room temperature, enjoying the contrast of crisp edges and rich, gooey centers. If desired, sprinkle with a touch of sea salt for extra flavor.
Pro tips for perfect cookies
- Bolded mini-head: Chill the dough for at least 30 minutes. This prevents spreading and enhances flavor.
- Bolded mini-head: Use fresh, high-quality chocolate chunks. They melt better and taste richer, creating gooey pockets.
- Bolded mini-head: Slightly underbake the cookies. The centers will stay fudgy and soft after cooling.
- Bolded mini-head: Rotate the baking sheet halfway through. Ensures even browning and crackling on top.
- Bolded mini-head: Add a pinch of sea salt on top before baking. It heightens chocolate flavor and balances sweetness.
- Bolded mini-head: For extra shine, brush cookies with a little egg wash before baking. They’ll shimmer and look tempting.
- Bolded mini-head: Store in an airtight container with a slice of bread. Keeps cookies moist and prevents drying out.
Common mistakes and how to fix them
- FORGOT to check oven temperature → calibrate oven for even baking.
- DUMPED in all chocolate at once → fold in gradually for even melting.
- OVER-TORCHED cookies → remove from oven at first cracks and shiny tops.
- MISSED resting time → let cookies cool fully for best texture and flavor.
Quick fixes and pantry swaps
- When cookies spread too thin → chill dough before baking.
- If chocolate isn’t melting → microwave in short bursts, stir until smooth.
- Splash a little milk when dough is too dry and crumbly.
- Patch cracked tops with a tiny dab of melted chocolate for a uniform look.
- Shield edges from over-browning by tenting with foil halfway through baking.
Prep, store, and reheat tips
- Prepare the dough in advance and chill for up to 24 hours; it firms up, making scooping easier and flavors deepen.
- Cookies can be baked and stored in an airtight container at room temperature for 3-4 days, staying chewy and rich—just keep them away from direct sunlight.
- Freeze baked cookies for up to a month; reheat in a 150°C (300°F) oven for 5-7 minutes until warm and gooey again, with a fresh aroma.
- Unbaked dough balls freeze well for 2-3 months. Thaw in the fridge overnight before baking for freshly baked cookies anytime.
Top questions about brownie cookies
1. How do I get the gooey centers?
Use high-quality dark chocolate chunks for that rich, melty experience. Cheaper chocolates may not melt as smoothly and can taste waxy.
2. When are the cookies done?
Bake until edges are set and crackled, but centers still look slightly soft. They firm up as they cool, giving that perfect chewy texture.
3. Can I make the dough ahead?
Chill the dough for at least 30 minutes before baking. It helps prevent spreading and deepens the chocolate flavor.
4. Can I freeze the dough?
Yes, freeze unbaked dough balls for up to 3 months. Thaw in the fridge overnight before baking for fresh, warm cookies anytime.
5. What type of chocolate should I use?
Use a mix of semi-sweet and bittersweet chocolate for pockets of intense flavor. Chunky pieces create delightful bursts of richness.
6. Can I make these dairy-free?
Replace butter with coconut oil for a dairy-free version. The cookies will have a slightly different melt-in-mouth texture and aroma.
7. How do I prevent uneven baking?
Bake on the middle rack and rotate halfway through. It promotes even browning and crackling on the surface.
8. Should I add salt?
A pinch of sea salt on top before baking enhances the chocolate flavor and creates a nice contrast with sweetness.
9. How should I store leftovers?
Store cookies in an airtight container at room temp for up to 4 days. For longer, freeze and reheat briefly in the oven.
10. How can I make the tops glossy?
For extra shine, brush cookies lightly with beaten egg before baking. It gives a beautiful glossy finish and makes them look more appealing.
Baking these cookies is like capturing a fleeting moment of chocolatey chaos—crispy, gooey, and a little messy. Each batch reminds me that perfection isn’t the goal, but the imperfect, melty center that makes them special.
They’re perfect for late-night cravings or a quick bake when you need a dose of comfort. In a way, they echo the unpredictable, joyful mess of life itself—sweet, a little cracked, and utterly worth it.

Hi, I’m Benjamin Reynolds, the creator behind Strategically Seasoning. I started this blog because I believe great cooking is not random. It is thoughtful. It is intentional. It is built step by step with purpose. Seasoning is not something you sprinkle at the end and hope for the best. It is a strategy.

