Creating Halloween treats that make kids and adults alike giggle is my jam. But this year, I wanted to craft something a little more mischievous—an edible graveyard that whispers secrets of the haunted past. The moment I started layering chocolate pudding and crushed cookies, I felt like I was digging into a spooky archaeology site, complete with dirt and tiny tombstones.
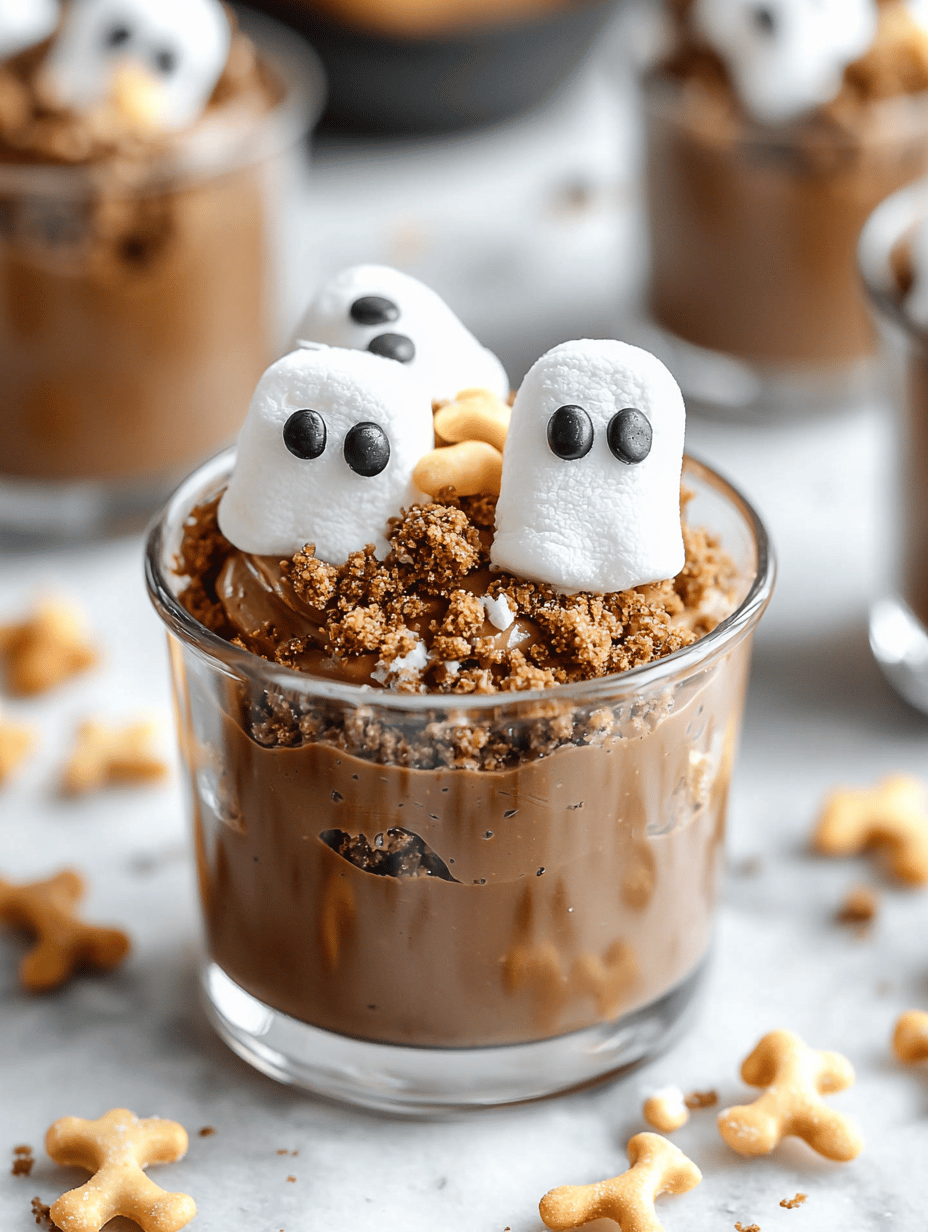
These Graveyard Pudding Cups are not just adorable—they’re packed with unexpected textures and flavors. Imagine the crunch of cookies, the smooth richness of pudding, and a spooky surprise lurking beneath the surface. They’re perfect for Halloween parties where chaos and creativity collide in the best way.
WHY I LOVE THIS RECIPE?
- Pure nostalgia — reminds me of childhood cemeteries made from candy and imagination.
- Joy of chaos—colorful toppings turn each cup into a mini art project.
- Relief that these are no-fuss, crowd-pleasing treats with a spooky vibe.
- Pride in making something that’s delightfully creepy yet tasty.
- Joy of seeing kids drag their spoons with wide eyes and grinning faces.
AVOID MY DISASTER (You’re Welcome)
- FORGOT to refrigerate pudding, it became crusty—chill it for 30 minutes before serving.
- DUMPED edible dirt all over, then remembered to use a sifter—texture matters!
- OVER-TORCHED mini tombstones, turned black and brittle—use low heat or hand carve instead.
- SKIPPED the edible glitter and it looked dull—add shimmer for extra spookiness.
QUICK FIXES THAT SAVE YOUR DAY
- When pudding is too thin, splash in a little whipped cream to thicken.
- Patch cracked cookies by gently pressing broken pieces into the dirt layer.
- Shield from melting by chilling cups an extra 10 minutes before decorating.
- When tombstones fall apart, use a tiny dab of icing to stick them upright.
- For a quick fix, swap crushed chocolate cookies with crunchy graham crackers—added extra crunch!
These Graveyard Pudding Cups aren’t just treats—they’re stories in miniature, perfect for this haunted season. The contrasting textures and rich chocolate aroma make every spoonful a tiny adventure. Plus, they turn any gathering into a spooky, fun-filled event without hours of work.
As the nights grow colder and ghosts start to stir, this recipe offers a fun way to indulge and unleash some creative chaos. It’s a simple way to add a little spooky flair to your table, with flavors that remind us of childhood wonder and mischievous snacks. Happy haunting—and happy eating!
Graveyard Pudding Cups
Ingredients
Equipment
Method
- Pour the milk into a mixing bowl and whisk in the chocolate pudding mix until well combined and smooth, then let it sit for a few minutes to thicken slightly.
- If using, whip the heavy cream in a separate bowl until soft peaks form, then gently fold it into the pudding mixture for extra creaminess.
- Distribute the pudding evenly into individual cups or small jars, filling each about halfway to leave room for layering.
- Sprinkle a generous layer of crushed cookies over the pudding, mimicking dirt and creating a crumbly, textured surface.
- Add miniature tombstone decorations or candies on top of the 'dirt' to create haunting grave markers.
- If desired, dust the finished cups with edible glitter or shimmer for a spooky, sparkly effect.
- Chill the pudding cups in the refrigerator for at least 30 minutes to set and allow flavors to meld.
- Once chilled and set, serve the Graveyard Pudding Cups with a spooky flourish and enjoy the layered textures and creepy visual appeal.
In the end, Halloween is about celebrating the spooky, the silly, and the delicious. These graveyard pudding cups are a reminder that sometimes the best treats come from a little messy fun and a lot of imagination. They’re perfect for creating memories that are just as sweet as the pudding itself.
So gather your ingredients, summon your spooky spirit, and have fun transforming simple desserts into creepy little masterpieces. After all, Halloween only comes once a year, and these cups will leave everyone craving another visit to the haunted dessert table.

Hi, I’m Benjamin Reynolds, the creator behind Strategically Seasoning. I started this blog because I believe great cooking is not random. It is thoughtful. It is intentional. It is built step by step with purpose. Seasoning is not something you sprinkle at the end and hope for the best. It is a strategy.

